Simply CRM allows you to create personalized webforms to improve your conversion rates and capture leads from your website. Visitors that enter their details in the webforms will automatically be added as leads.
Create webforms
To create a webform in Simply, open Settings and choose Webforms under Automation. Click on the Add Webform button in the top right corner.

In the new window, enter the webform information. If you’re uncertain what each field requires, consult the table below.
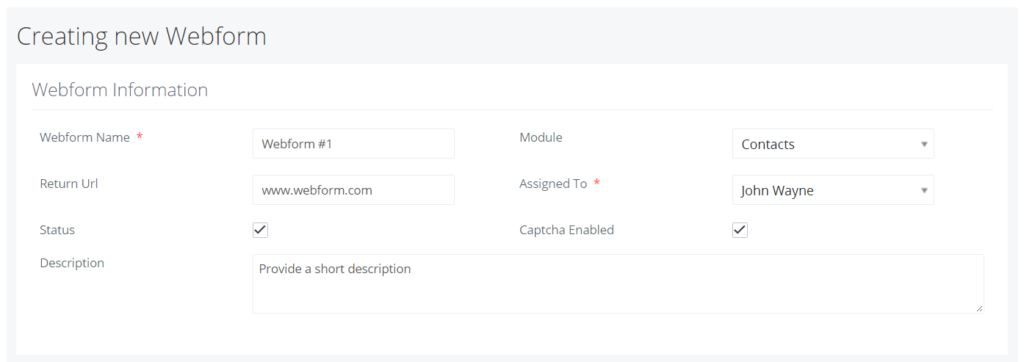
| Field | Description |
| Webform Name | Enter a unique webform name (used only for your reference) |
| Return URL | Enter the URL to which the user will be sent after submitting the details |
| Status | Allows you to choose whether the webform is active or not |
| Description | Provide more details about the webform (used only for your reference) |
| Module | Select the module in which the new record will be created |
| Assigned To | Select the user to whom the record will be assigned |
| Captcha | Allows you to prevent spam and bot generated leads (it’s highly recommended to enable this option) |
Important: Aside from the default modules, you can also create webforms for custom modules.
In the User Assignment block, you can assign the records generated from the webform to users in your instance of Simply using the round robin method. You can select the users from the Round Robin Users List option on the right side.

In the Field Information block, you can choose which fields you want to include in your webform. Keep in mind that the fields that you select here will be displayed as part of the webform on your website.
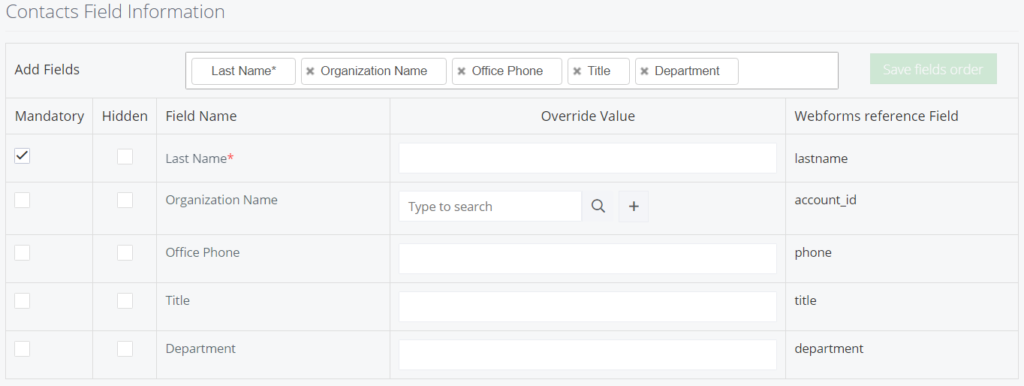
Important: Mandatory fields are automatically selected in Simply.
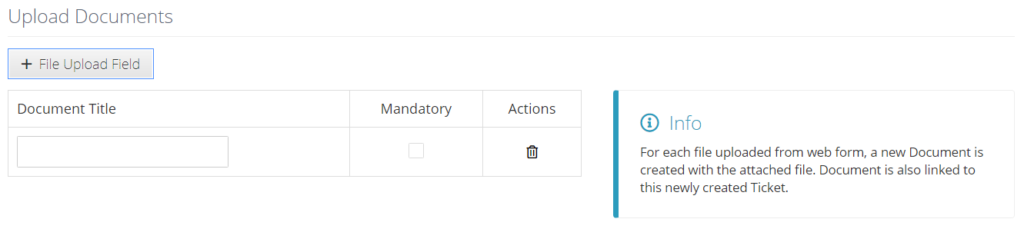
Upload documents
You can allow your website visitors to upload documents using the File Upload Field. These documents will be attached to the record that is created when the user submits the webform.
Simply press on the File Upload Field to enable this option.
When you finish configuring all the settings, press Save.
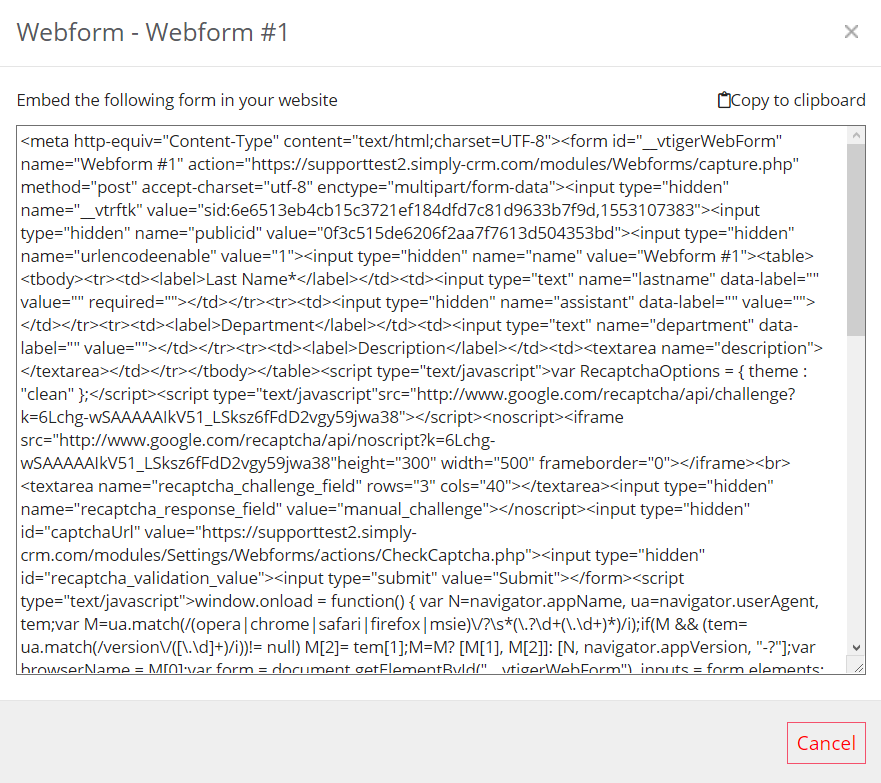
Generate ready-to-use webforms in HTML
After you create a webform, you will automatically be led to its detailed view. There, you can press on the Show Form button in the top right corner and copy the HTML code to add the webform to your website.
Integrate existing webforms
In case you already have webforms on your website, you can integrate them with Simply CRM by establishing a relationship between the two entities.
Public ID and Post URL, which are configured automatically when you create a webform in Simply, are especially useful here. You can find these two fields in the detailed view of your webforms.
- Public ID is used to establish a relation between the existing form and Simply webforms. For example, <input type=”hidden” name=”publicid” value=”Paste Your Public Id Here”>.
- Post URL is used to specify the location where the webform information will be submitted. For example, <form name=”Place Your Webform Name Here” action=”Paste Your Post URL Here” method=”post” accept-charset=”utf-8″>.
Modify field names in existing fields
In case your existing forms have different field names, you will need to change them in accordance with the Webforms Reference Field name. You can find the corresponding values in the detailed view of your webform in Simply CRM.


